REGISTER YOUR INTEREST
CONTACT DETAILS
PO Box 1423 Hervey Bay
Queensland 4655
Opening hours:
Monday to Friday 8:30am – 5:00pm
Saturday & Sunday by appointment
How to backup the site using Snapshot
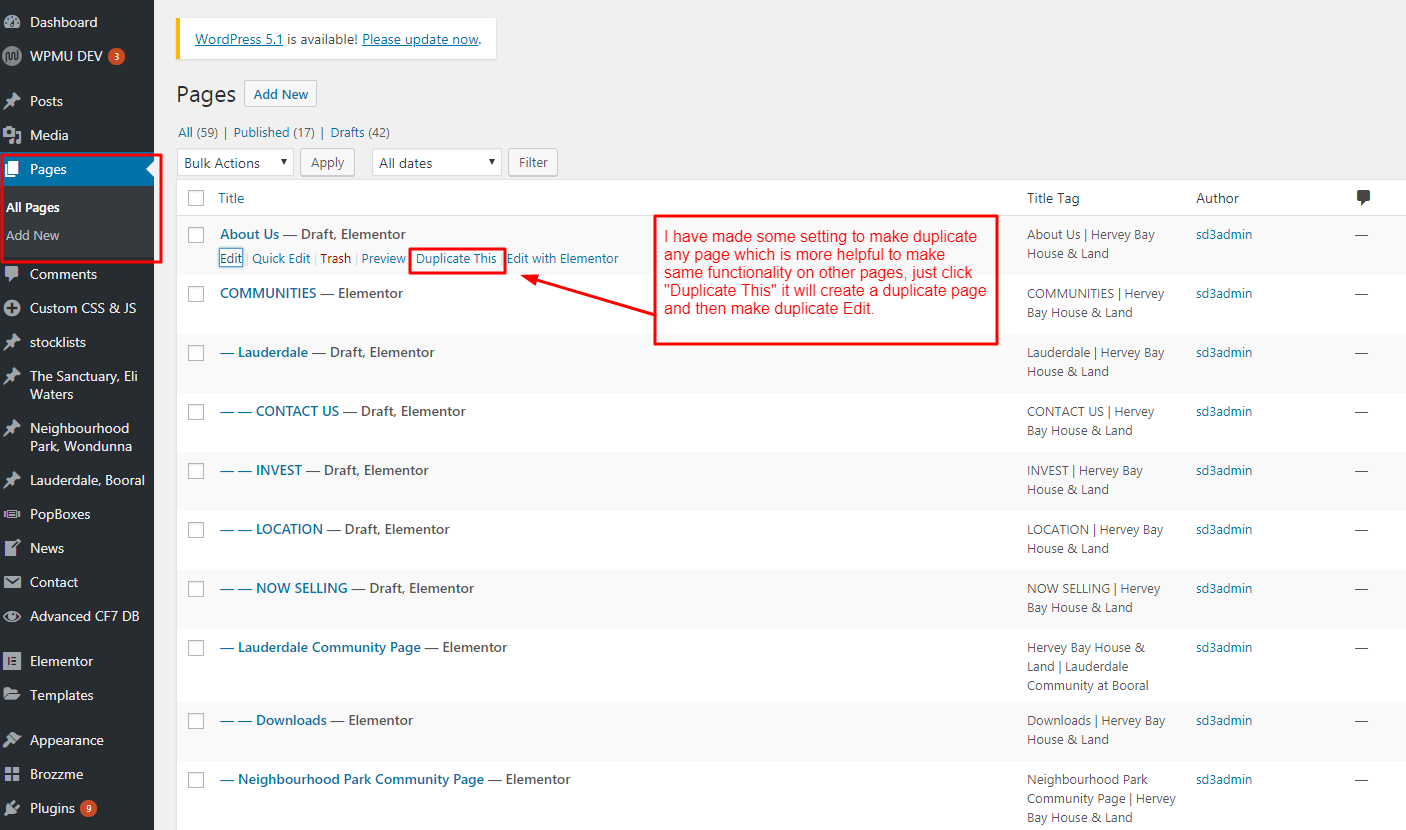
How to Duplicate a Page or Post
How to add new property listing (e.g. Lauderdale, Booral)
How to add an image gallery to a post
How to use Elementor Page Builder
NOTE: Always ensure you backup your site before updating plugins
NOTE: Always ensure you backup your site before updating WordPress

There are different dimensions for the different purpose and will be auto-scaled where needed.
– Ideally for the feature post size or thumbnail should be 1280 x 566
– Background images should be at least 1920 x 849
When editing the listing, scroll down to here:
View the listing front end to ensure it is displaying how you want it.
Below are summaries of Elementor documentation. Click on any of the headings for further information from Elementor.
A Full-Width Page means the content spans from right to left and takes the full 100% of the screen’s width.
With Elementor there numerous ways to do this, here are three:
 to enter the Section Settings
The Canvas Page Template removes your Header and Footer and Sidebars.
This is great for creating specific pages inside your website, pages such as: landing pages, coming soon pages, maintenance mode pages etc.
 on the Left side, and under Page Layout look for the Elementor Canvas option
The Header Template lets you easily design and edit custom WordPress headers.
 > Layout > HTML Tag > Change Default to Header.
The Footer Template lets you easily design and edit custom footers.
When you visit a site’s blog and see a list of published articles, you’re actually viewing an Archive page. Archives have different terms that you can use to filter them, terms you’re familiar with: Author, Date, Category, Search results, Recent posts, Tags or any other taxonomy.
When you use a theme for your website, you get your theme’s Single Page Templates. With Elementor you can control the layout & design of the Single Page Templates.
=================================================================================